Introduction
Discover a tried-and-true web design process (developed over many years) that will greatly benefit you and the customer. This article will help you to maintain the schedule, stay on budget – and be highly efficient!
While a trial by fire philosophy can be one method in which to learn – it is not recommended in business. Why? Because we all have limited resources: Time, passion, energy and money are just a few. So, you can rapidly enhance your learning curve by studying information by companies who have the experience and are willing to share!
The purpose of this article is to explain our in house web design process for a basic, informational website. We have built hundreds of websites over the years, have learned a little bit along the way- and would like to share some of this wisdom with you.
Because we are developers, this article is written primarily from the developer’s perspective. However, anyone should be able to follow along and hopefully they might learn something interesting- if not a lot more!
The Funnel. We like to think of our process much like a funnel. At the top, information is swirling and much of it is undefined. As we progress down the funnel, i.e. our “the steps of our process,” information and output become more clear, concise and ultimately becomes a turnkey website.

Developers need to follow documentation when they build. Ever heard of the biblical Tower of Babel? This is what happens when the size, scope and expectations are not defined- or followed. We have a saying in the IT field: “for every one hour of proper planning, you will save six hours in development time.” This is very true and is a major factor in the profitability (or not) of a development shop.
Now that we have the philosophical stuff out the way, let’s have some fun!
Step 1: Gather Requirements
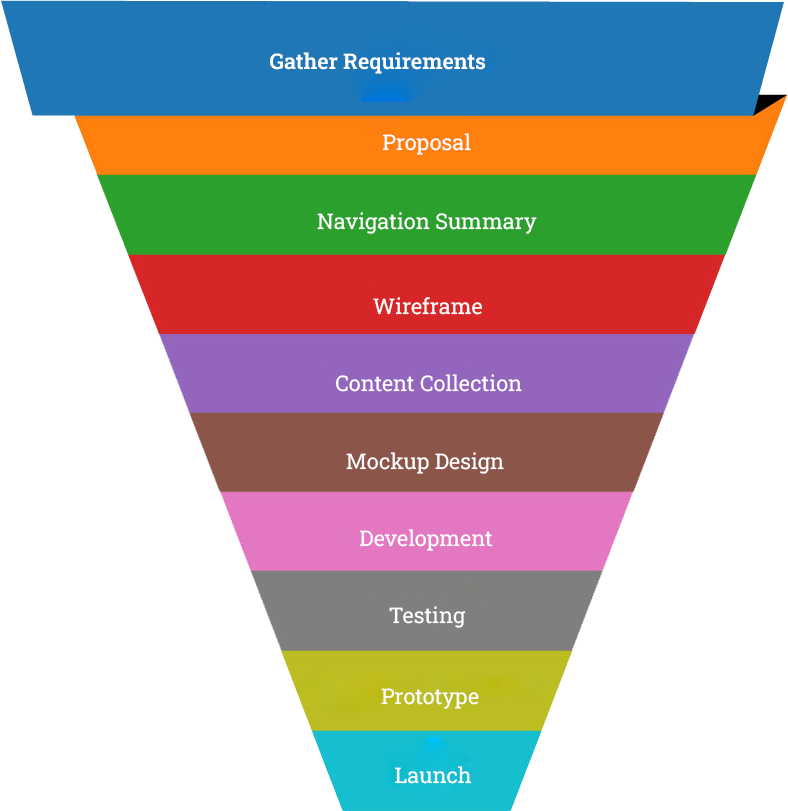
In many cases, especially for those with little business experience, this is the most important step of the process. Understanding the expectations, scope and resources needed can properly align both the customer and developer for future success. This is important because any type of business transaction should be done only in a “win-win” situation for all parties involved.
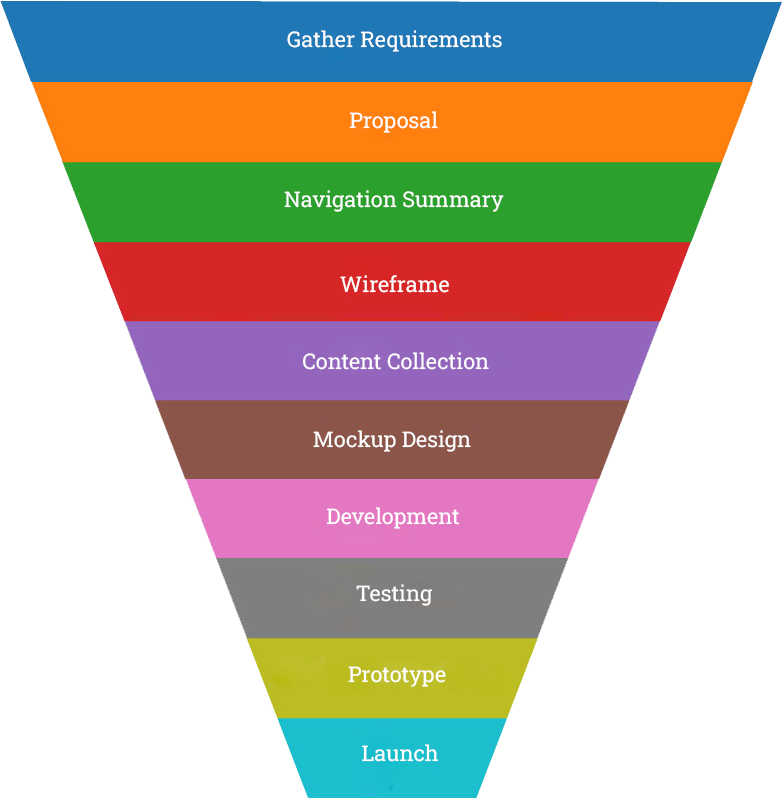
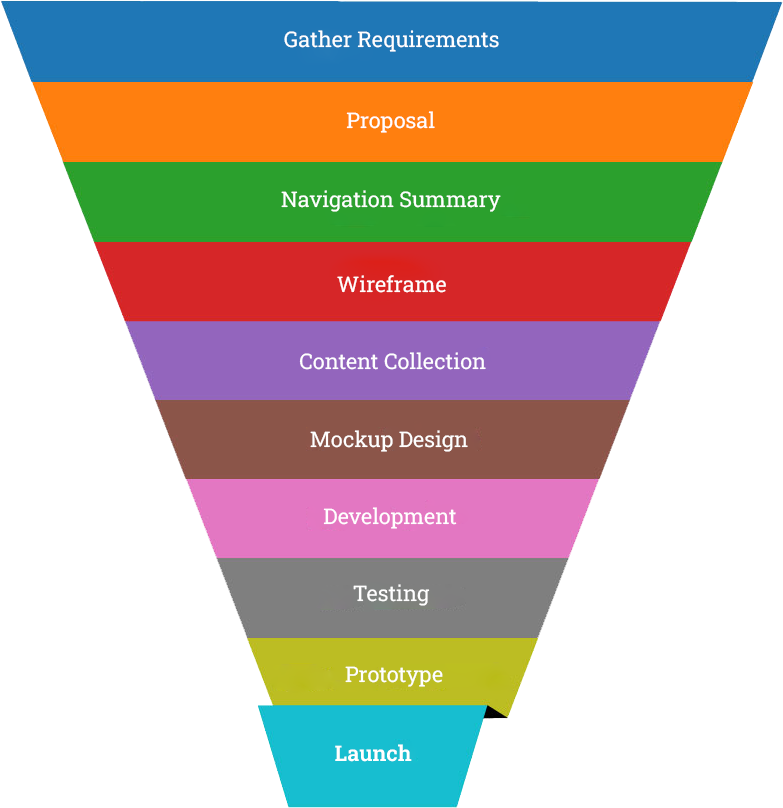
Have you ever heard the phrase: Fail to plan – plan to fail? This nugget of truth is true in so many aspects of our lives and also applies to building web projects. And in a really big way.
A great firefighting team doesn’t run head first into a burning building without first having a plan of attack. This applies to doctors going into surgery… military operations, construction projects – and the list goes on and on. And this logic (of planning) applies to websites as well! Understanding the scope of what you are about to get into is NEVER wasted time. In fact, it is one of the smartest time expenditures you can ever make.
IMPORTANT NOTE: YOU MUST IDENTIFY THE SIZE AND SCOPE OF THE PROJECT- AND IF THE CUSTOMER HAS MONEY TO PAY FOR IT. THESE TWO GO TOGETHER LIKE HAND IN GLOVE.
Technical Requirements. Think of everything technical related to the project. Domain name, website hosting, content management system, email, etc. should be identified as line item work orders and each priced accordingly. If the customer is not tech savvy, offer to do it for them with their company credit card.
Provide a Ballpark Estimate. By this time, you should have a ballpark estimate (+) or (-) 10% of the total fee in your head. Verbally tell them and see where they are on things. In the event the customer wants a lower price, you can offer to scale down the size of the project and any type of special functionality it may have. And keep in mind you should never go below your basic fee. Why is this important? You should factor in accounting, design, management, copywriting and other miscellaneous fees when considering your starting price.
Following a website design is critical in ensuring satisfaction and profitability. It also makes work more efficient, helps in communication and almost guarantees a happy customer at the end!
You may see this type of offer: “I have an unbelievable service/product and we are looking for a partner to build it. Once we start making money off this, you will get paid big time!” Basically, they are asking you to work for free. You can/will hear statements like “this is my dream,” or “it has a multi-million” dollar potential, etc…
Basically, they are asking you to work for free. You can/will hear statements like, “This is my dream,” or, “It has a multi-million dollar potential.”
If you accept the terms, this is what happens: You excitedly begin working on the project the first few weeks. However, no revenue is coming into your business. Then, you begin to work on other projects that actually pay you money. Then, your new business partners begin to get irritated with you with their stalled project… wash, rinse and repeat.
This always ends in disaster and you want to avoid it like the plague. Here is what you tell them as soon as you hear this type of offer: “Thank you for your offer, but this is your dream. I have my dream and it is my company doing work for customers just like you. In addition, we work for U.S. currency only- I am a developer/small business and don’t have the resources to be your bank.” They will quickly be gone and you will never hear from them again. But don’t worry, it’s best for both parties.
Step 2: Proposal
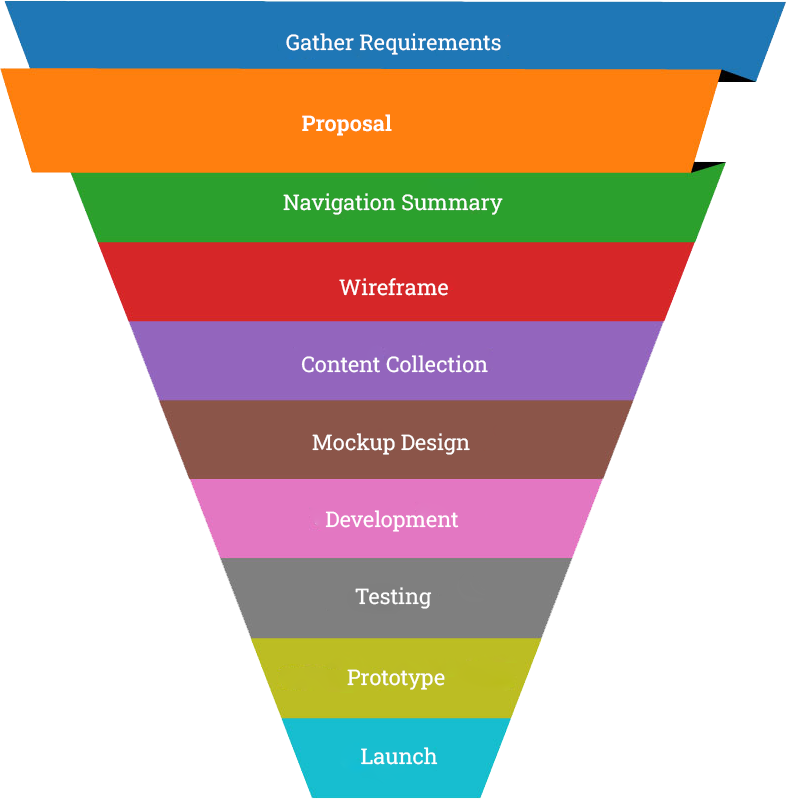
When you need to formalize something, write it down. You can call it a contract, estimate, proposal, etc.; the main point is to have a document that both developer and customer both understand what is being delivered- along with expectations, timeline and price. A proposal also helps to control the scope of the project or “put a fence around what is being requested” so there are little-to-no misconceptions about the work being done.
The proposal should at minimum feature the following sections: Introduction, expectations, navigation summary and functionality, development process with integrated schedule and fee. An example of our proposal is found here. In addition, the proposal should be a predefined template that you populate with the customer’s requirements. Hint: Learn about the Website Project Cost Overrun!
When creating your Proposal, make sure to add an Expectations section which covers such basics as response times, working hours, assumptions, etc… This is very important!
Always remember the proposal is an agreement between you and the customer.
Because of this, you need to review it with them over a phone call from top to bottom. It doesn’t have to be a long call – and it is smart to have them do a quick review beforehand.
As you go over the line items, you can answer any questions they may have as well as help establish a really good first impression that you are a professional.
If you simply send this to them via email (with no collaborative review), many customers tend to briefly scan the document all the way to the price/fee.
And guess what? They really don’t gain a strong idea about how you work, expectations, etc…
So take the time to review with them on the phone – and you will greatly increase your chances of long term success with the client.
Customer Signature: An email/digital confirmation in the form of an “I accept these terms” is all you need for smaller companies. Larger ones tend to require signatures in accordance with the billing protocols… I am mainly trying to help you cut down the bureaucratic red tape so you can get to work and be profitable.
Step 3: Navigation Summary
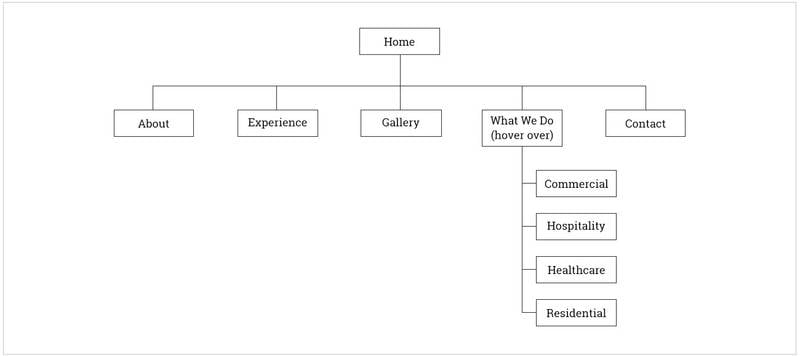
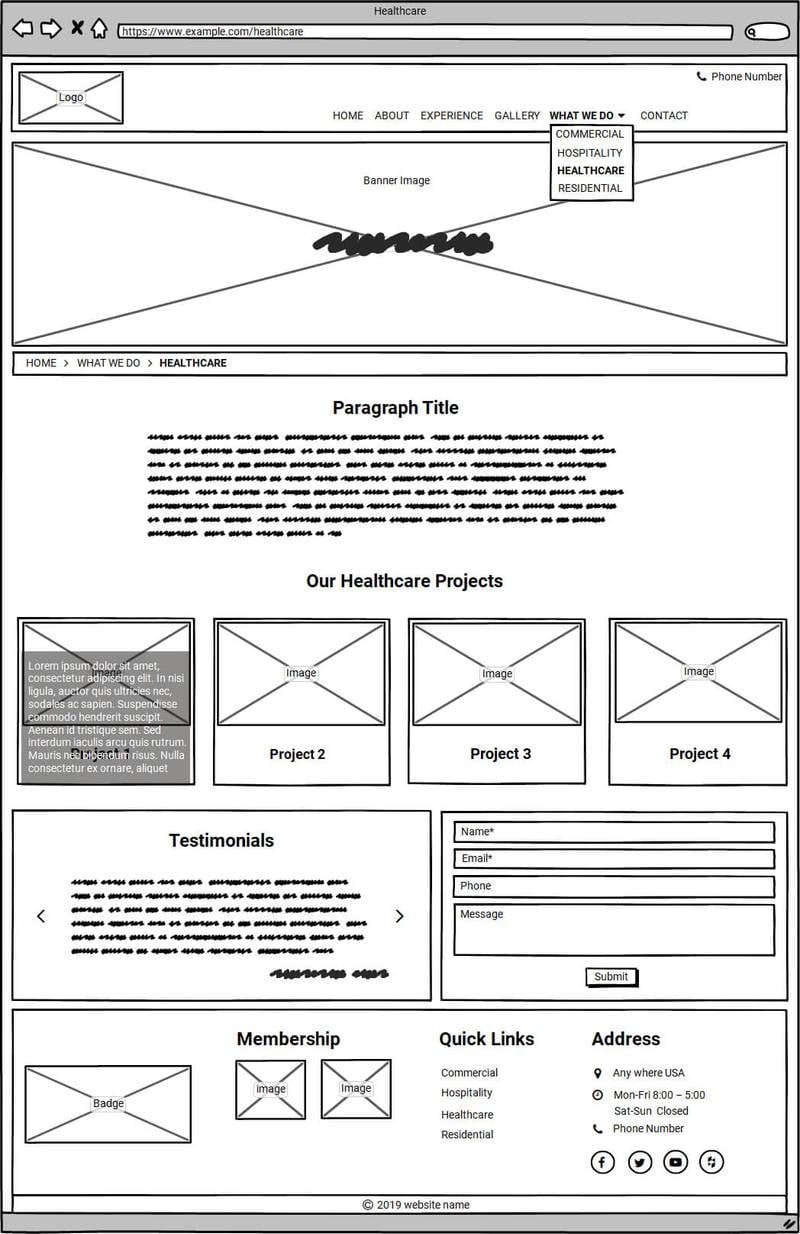
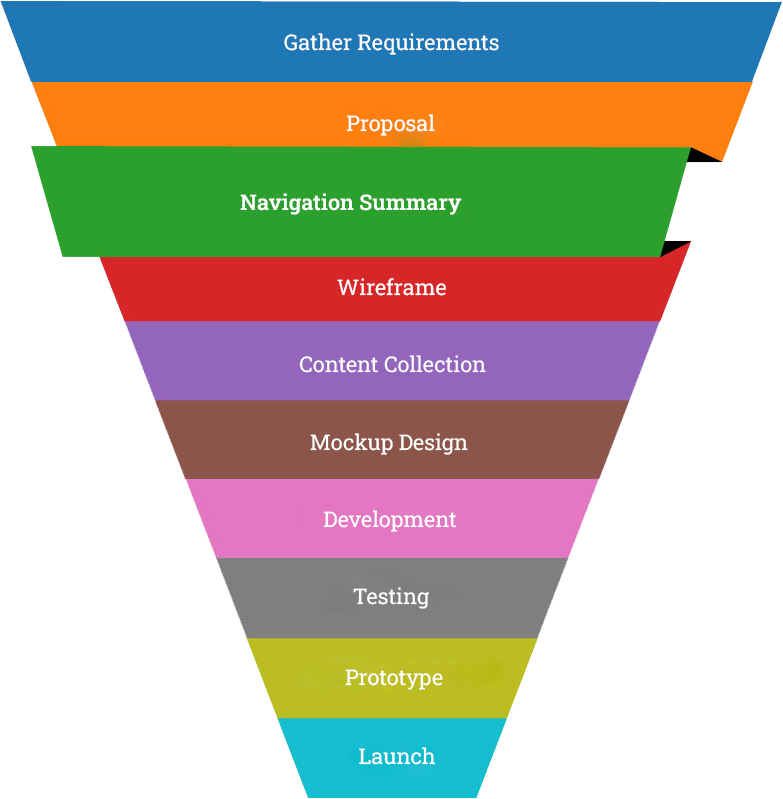
There are many names for this to include but not limited to: Site tree, site structure, navigation tree, site navigation, site organizational chart, etc…Essentially, this is the time to organize the website’s main pages and associated sub pages and to also describe technically how they will display. For example, there are drop down menus, fly outs, hover overs, mega menus, top navigation, side navigation…you get the point. This is the time to visually explain “how” all this is going to happen.
A navigation summary is the roadmap for the website.
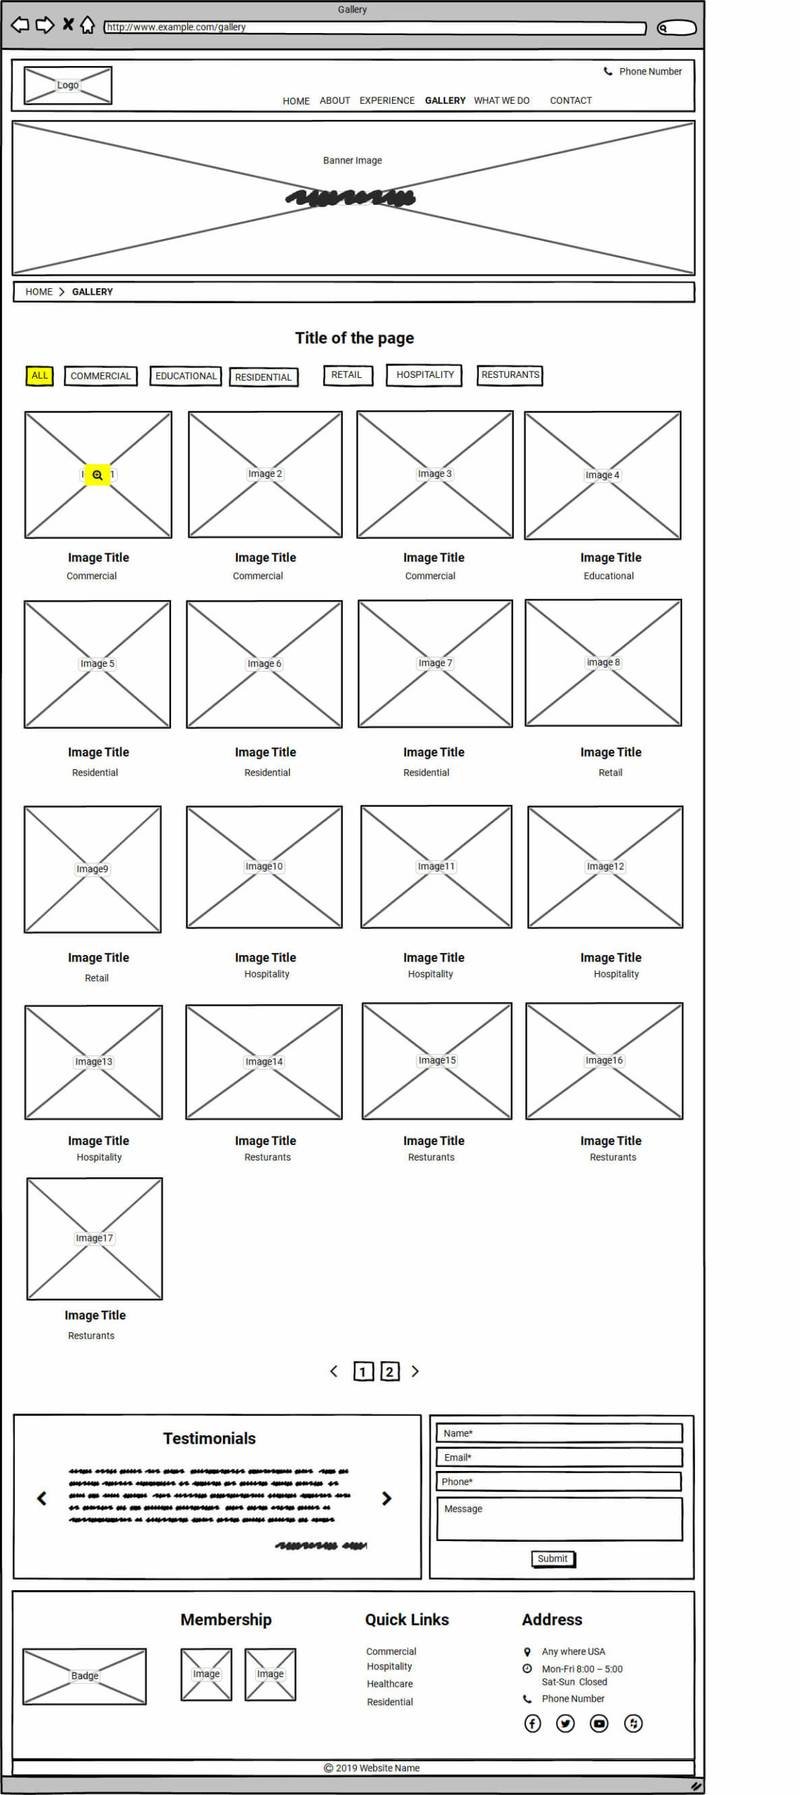
An experienced developer should be able to take hundreds of web pages (if necessary) and organize them for the user to find anything with 1,2,3 or 4 click- max. Try and keep the main navigation links to less than ten.
Why? Imagine walking into a library and every book is off the shelf and opened. You would literally be bombarded with information and see nothing- think information overload. By keeping the web page interface clean and simple, the visitor should easily be guided to the information they are looking for.
Step 3: Navigation Summary
The navigation summary is the “driver” of the wireframe.
Each page mentioned in the navigation summary should have a corresponding wireframe. And ensure the navigation summary is approved before going to the next step.
Think of the Navigation Summary as a visual version of your site tree. It gives a better understanding of the project and also helps to “put a fence around it.” This fence is important in keeping the scope contained along with your profitability.
Need further clarity? Imagine looking at real estate listings online. Then select a property to look at. Now focus on the style (single family, townhome, condo, etc.) of the house along with square feet – and the number of bedrooms and bathrooms… Your navigation summary functions much in the same way!
Change Orders begin here too!
CHANGE ORDERS BEGIN HERE. And they can be implemented throughout the rest of the web design process until site launch.
Since the website’s pages are already mentioned in the proposal, any request to add pages and/or functionality to the website can have a dramatic impact on your profitability.
Remember, you have already bid the job. An example of this would be the customer asking “can you add a photo gallery for me, I just realized we need that.”
Well, that request could easily take up to 25 additional hours once you find the appropriate technology, install it, collect and load images- and then train the customer how to do it. You need to get paid for that!
Enter the change order. A change order is a document that reflects a change in the scope of work requested by the customer. It should explain the item along with the cost, adjusted timeline and fee.
It should also be billed to the client 100% upfront before any more work is done on the project.
Why? For starters, you now have a delayed project. Since most developers invoice around 50% down and 50% upon completion, this means you are not getting paid the latter half until a later date.
Also, by billing in this manner, it let’s the customer understand the seriousness of scope changes and discourages the behavior to constantly want to change things during the development of their project.
It is also important to know that change orders can supersede and/or add to the legal agreement you have with the customer. Once the change order has been approved and paid for, it should immediately be added to the project timeline as if it were in the original proposal.
Step 4: Wireframe
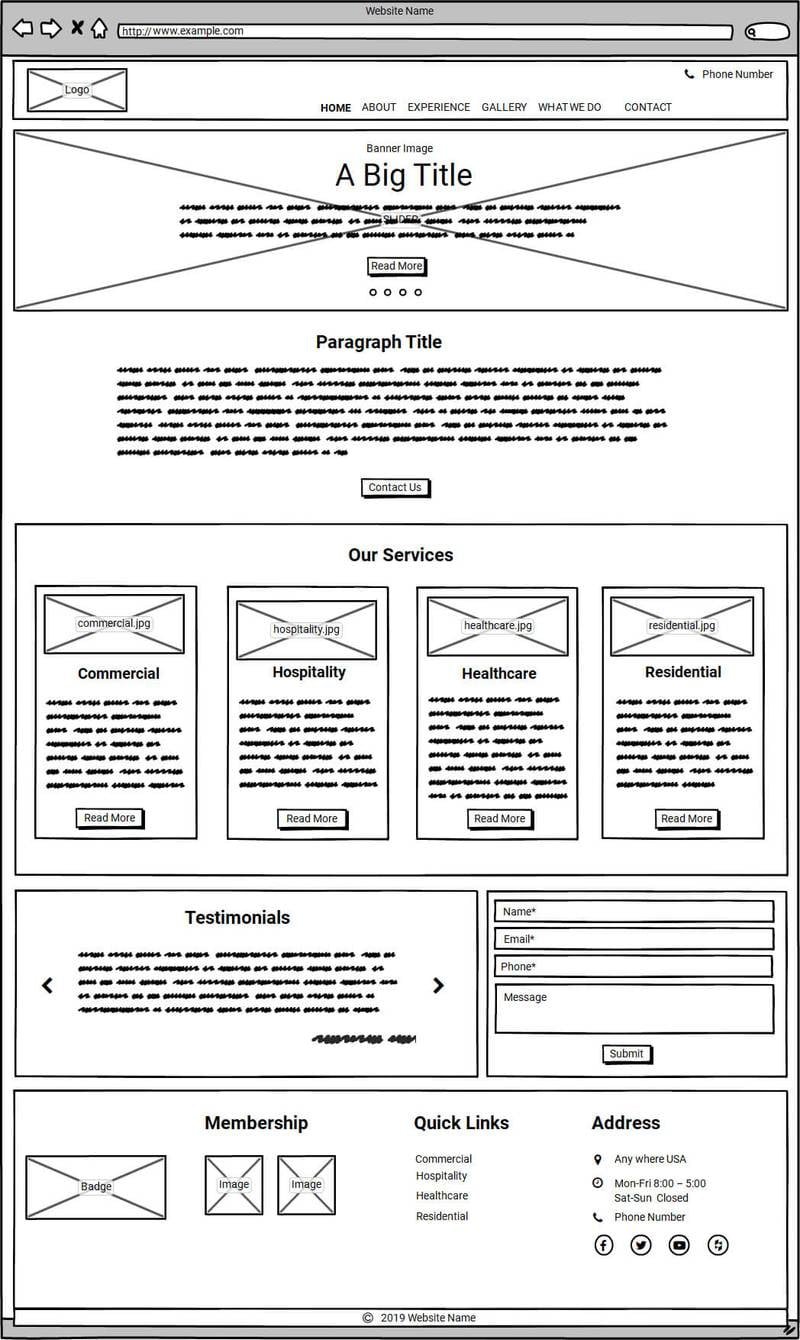
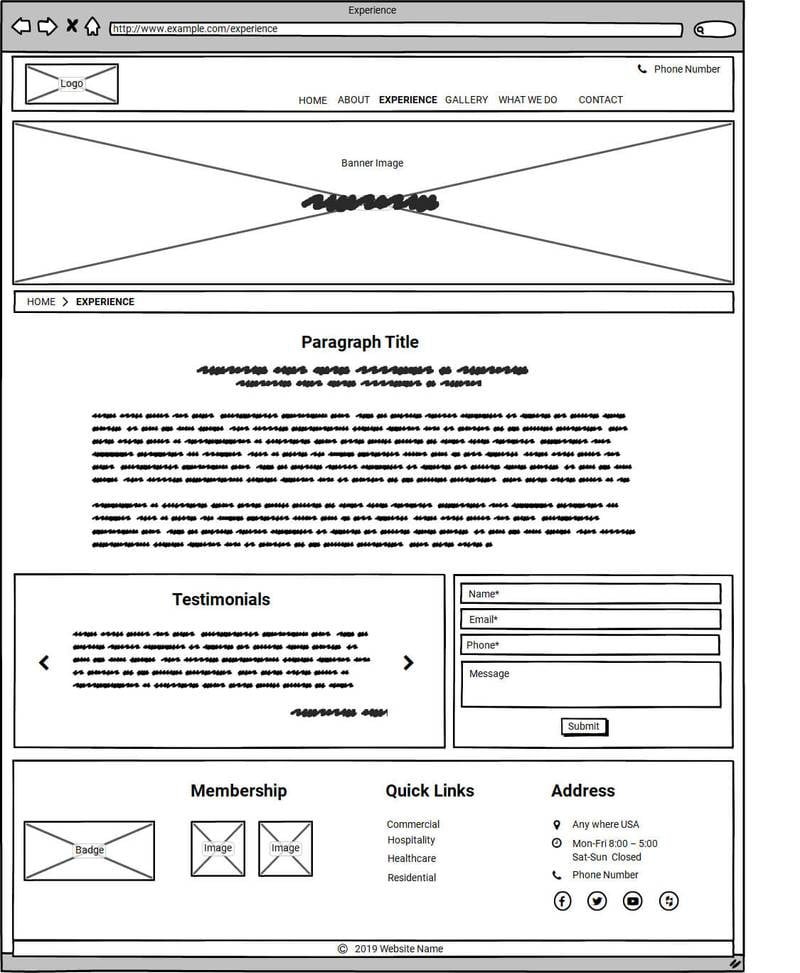
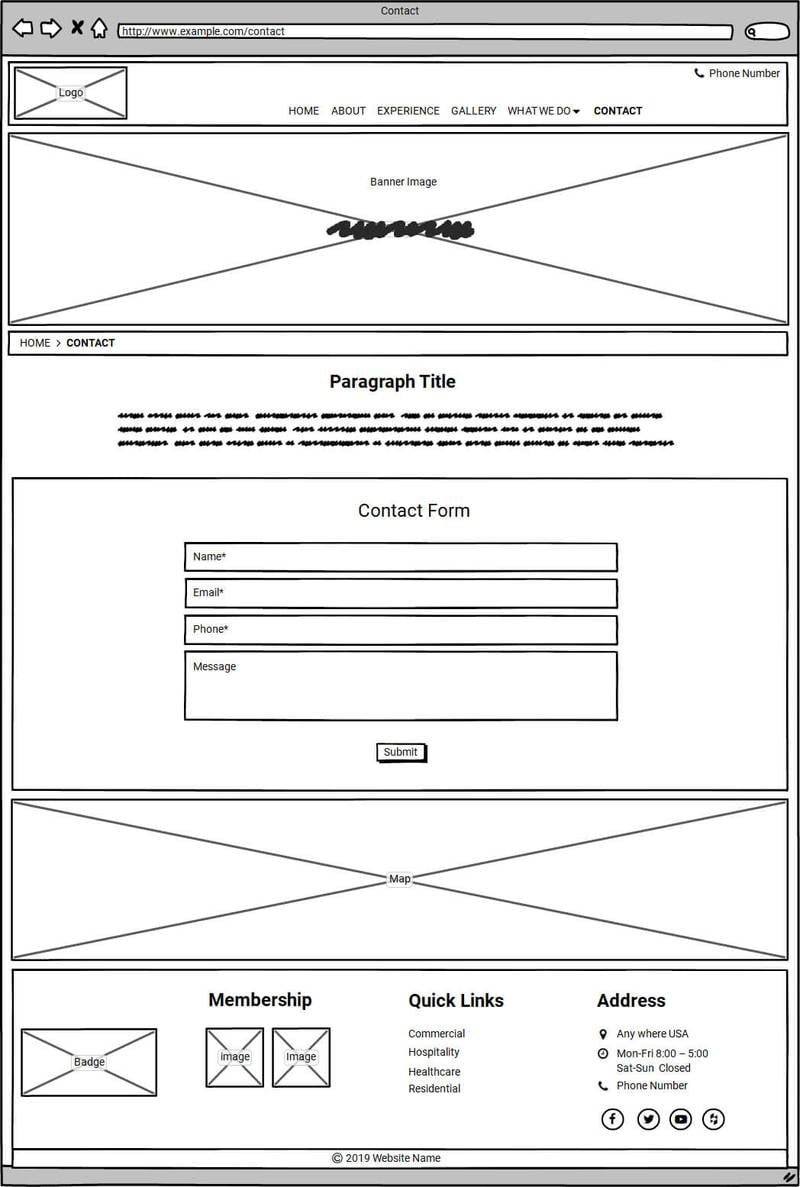
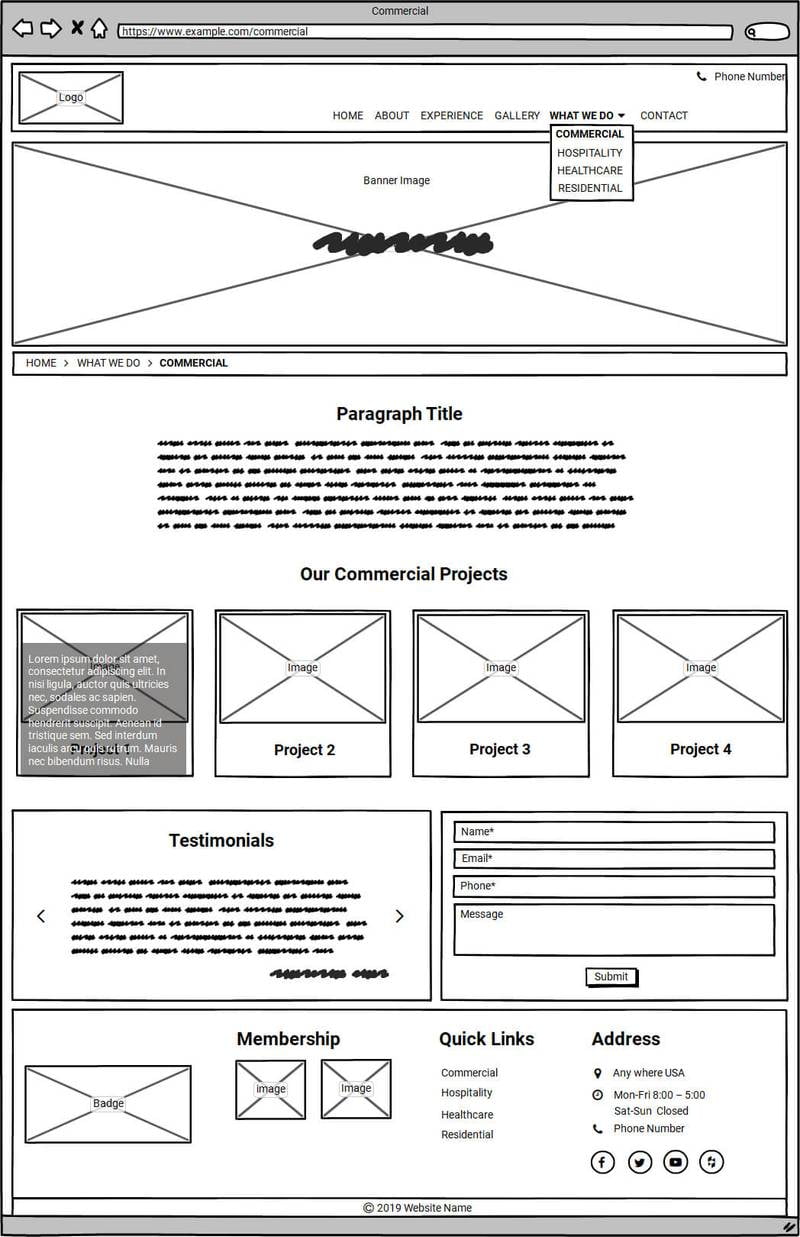
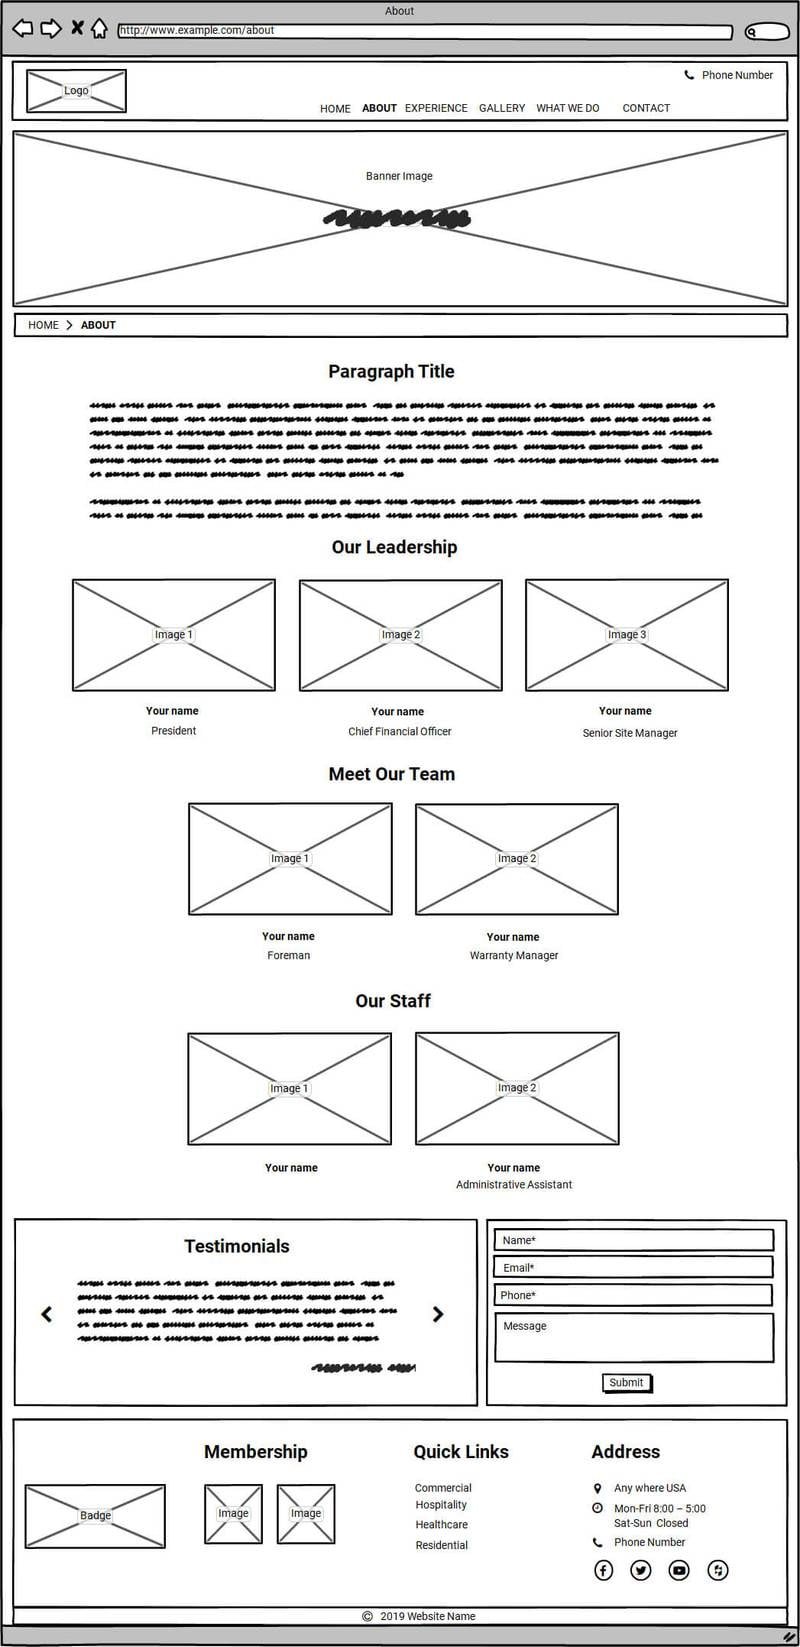
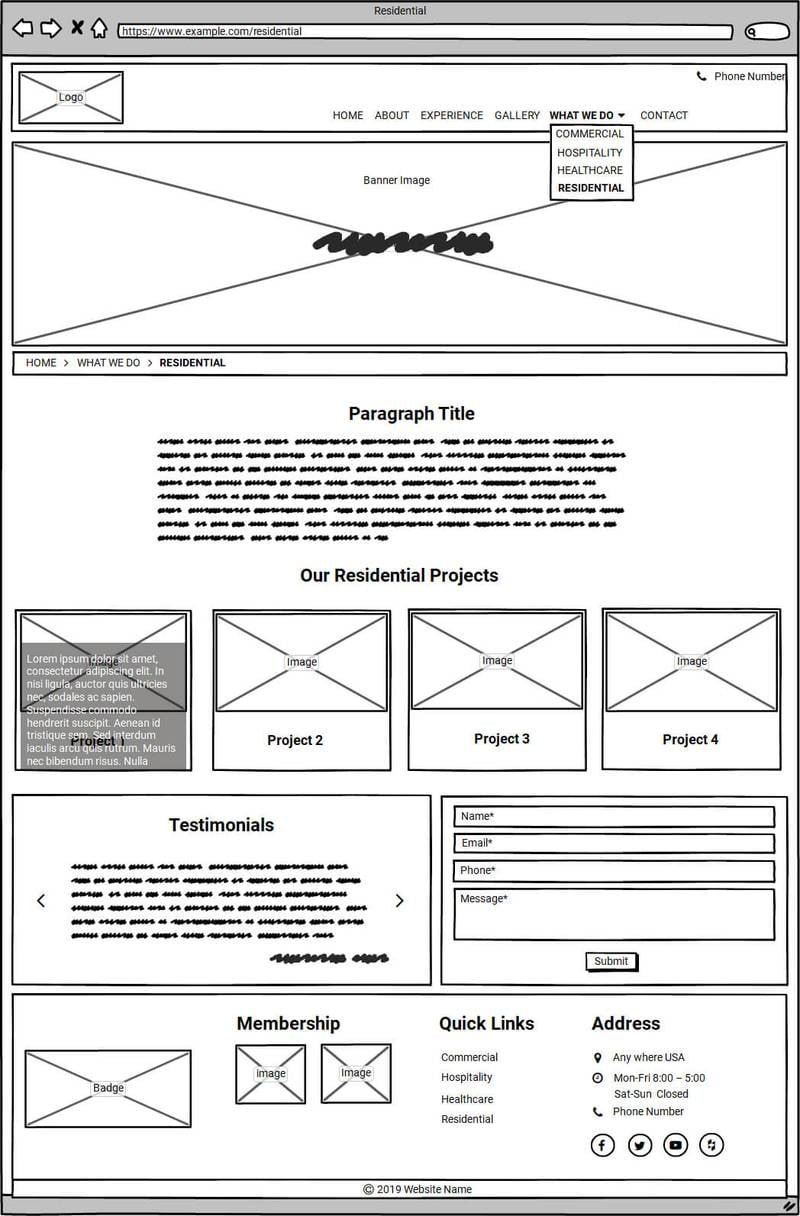
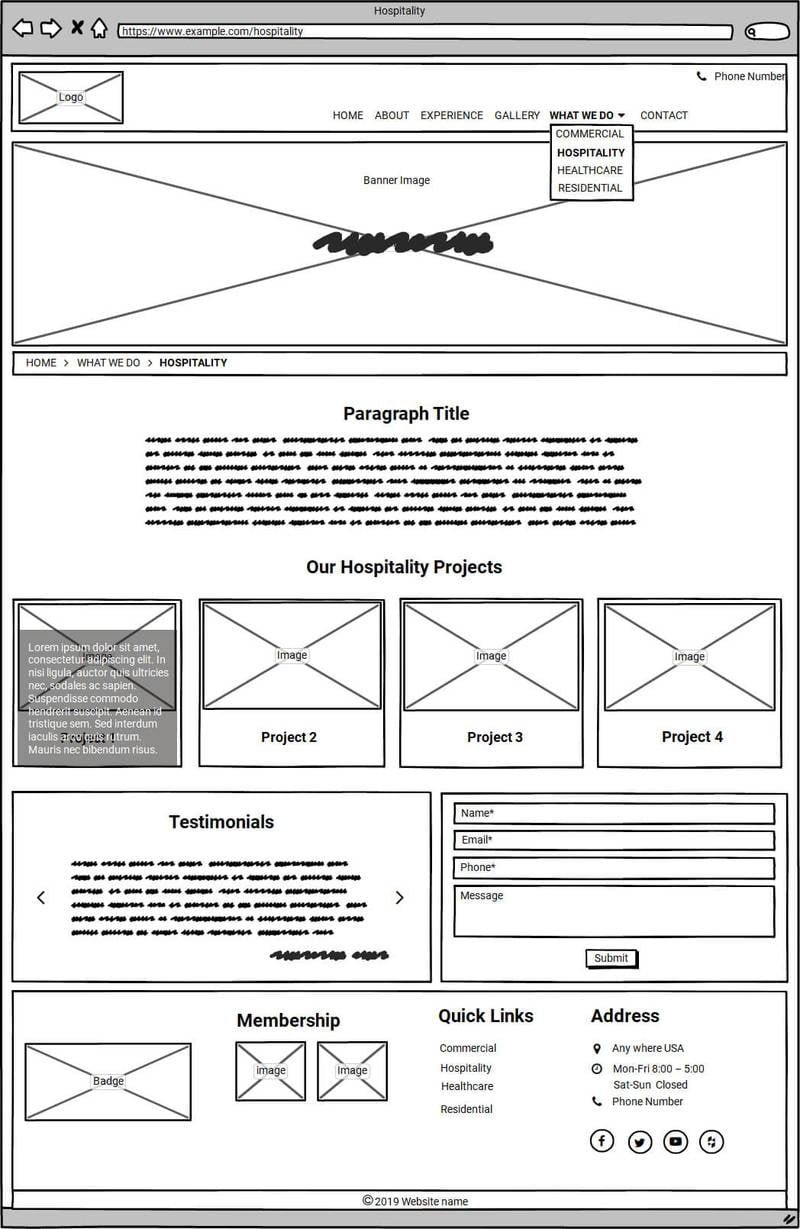
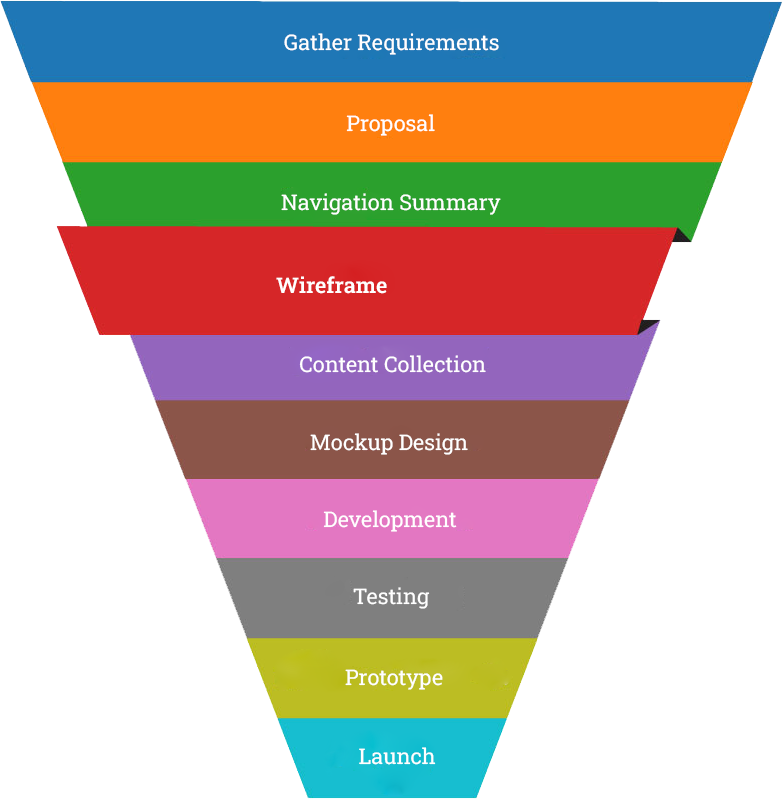
Wireframes are not-to-scale black and white blueprints to show every page on the website.
We cannot overstate how important wireframes are to the creation of a great website. Nobody builds a house without blueprints, yet many amateur developers skip this very important step and jump into the mockup design phase. They do this because they think blueprints are a waste of time.
In reality, they are a massive saver of time. Blueprints match both customer and developer expectations for what is being built. Furthermore, when the client is engaged in the blueprint creation process they see the developer’s professionalism and attention to detail for the project.
So make wireframes as detailed as possible!
Guess what? Later on in the project, the customer tends to already have a favorable view of their project since they have been involved since the beginning.
Special Note- We use Balsamiq as our wireframe building tool.
Other wireframe tools:
Remember- The wireframe drives all the required content!
Not only is the content defined, the file name in which it needs to be sent is also shown. Having the proper file name makes it the developer’s job much easier when building the website. We like to mention all required content in a red font so it easily catches the eye. In our next step; Content Collection, we create a Content Inventory spreadsheet pulled directly from… see below!
Wireframes are blueprints of the web application that is about to be built. Think architectural plans. Blueprints are done first before any aircraft, spaceship, building, bridge, ship, etc…is ever constructed. Don’t make the novice mistake of designing first… or you will end up in the abyss.
Many developers try to combine the wireframes and mockups into one task in order to try and save time.
I get the logic: The two files are similar in nature and it can seem redundant to have to create not to scale detailed blueprints – all while having an idea of what you think the mockup design should look like.
Don’t do it.
Here’s the main reason why? Wireframes should be a main driver (i.e. influencer) of how the mockup designs should look.
By combining both, the customer automatically thinks they are in the design stage and immediately focuses on design elements (colors, borders, drop shadows for images, etc.).
You are now building a house with no blueprints. And you never want to do that.
Self inflicted wounds are a painful way in which to learn how to build a website.
So be methodical in how you work, and each step/task should have a clear beginning and end before you move to the next.
Step 5: Content Collection
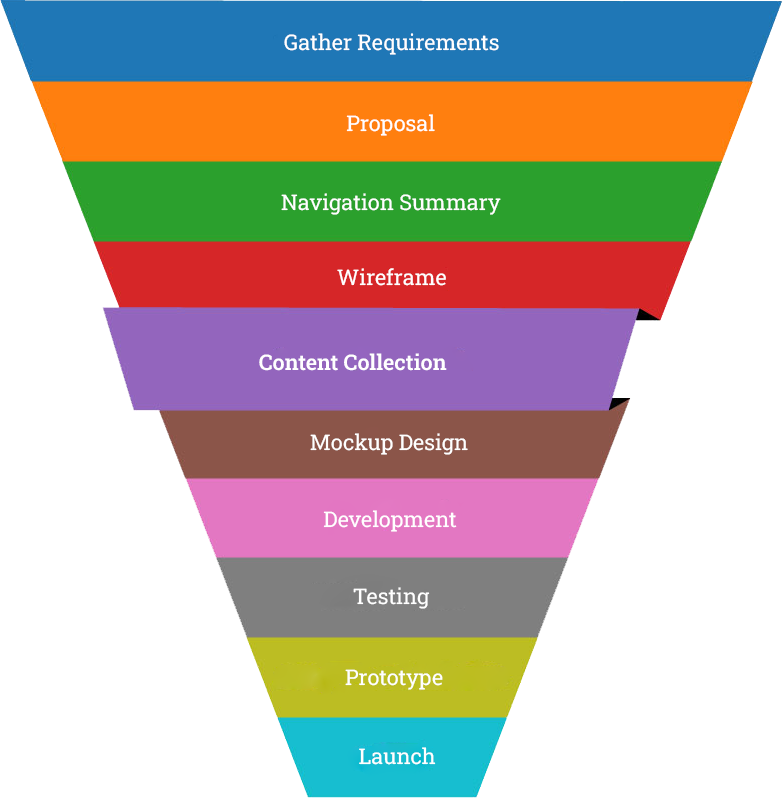
Typically, this usually represents somewhere close to the midpoint of a project. More importantly, this is typically where more than 60% of projects stall.
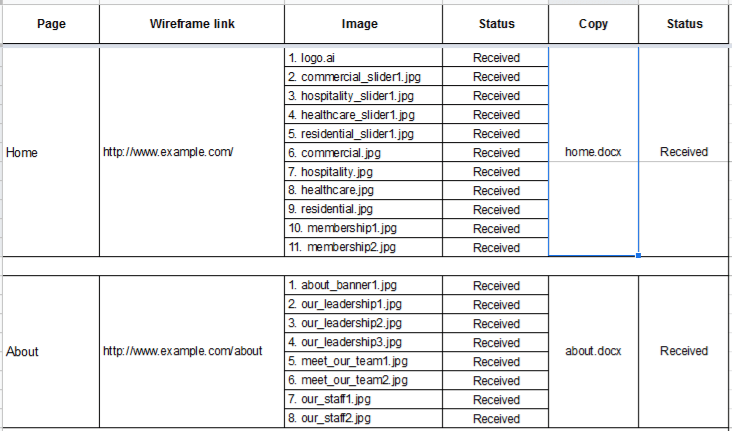
Why? Content collection is much of a client-dependent task as copy, images, testimonials, videos, bios and other types of content need to be gathered. One of the ways to mitigate this problem is to explain this scenario to the customer up front (without scaring them away) and ensure they are “bought in” and understand the importance of getting this information.
Content Inventory
Use your magnificent wireframe to create a Content Inventory spreadsheet.
Content collection tools:
- Google Sheet, for creating requirement list
- Google Doc, for copy collection
- Dropbox, for image collection
Warning! Do not proceed until the next step until 100% of the content has been received and inventoried.
Would you build a house if you were missing the second floor windows? No. Would you build the roof if you were missing the shingles? No. Imagine a half built house sitting in the elements for six months deteriorating as each day goes by. This is what happens if you try and build a website without all the content.
Content collection is the most understood and mismanaged task in web design. Do NOT start any design unless you have 100% of the content. Why? Content influences design and is also a very client dependent task. Once you get past this step, the project tends to be a rapid buildout.
Coach the customer in the content collection effort. Have a positive tone and try and get them excited to do this.
If not, you could be facing an almost guaranteed delayed project. In my career, typically about +60% of website projects are delayed because of the content collection step which is basically a client-side dependency.
The only way to avoid this is to explain this upfront and get them motivated to want to receive a website that is built on time.
Another great recommendation is to ask the customer to gather 100% of their content, properly label it, and send it to you AT ONE TIME.
Sending content to you in pieces can add a multitude of uncompensated hours as you are constantly opening emails, updating, responding… wash, rinse and repeat. You can also “sell” this concept to the customer by telling them this will also reduce their overall time a well. And this is true.
Step 6: Mockup Design
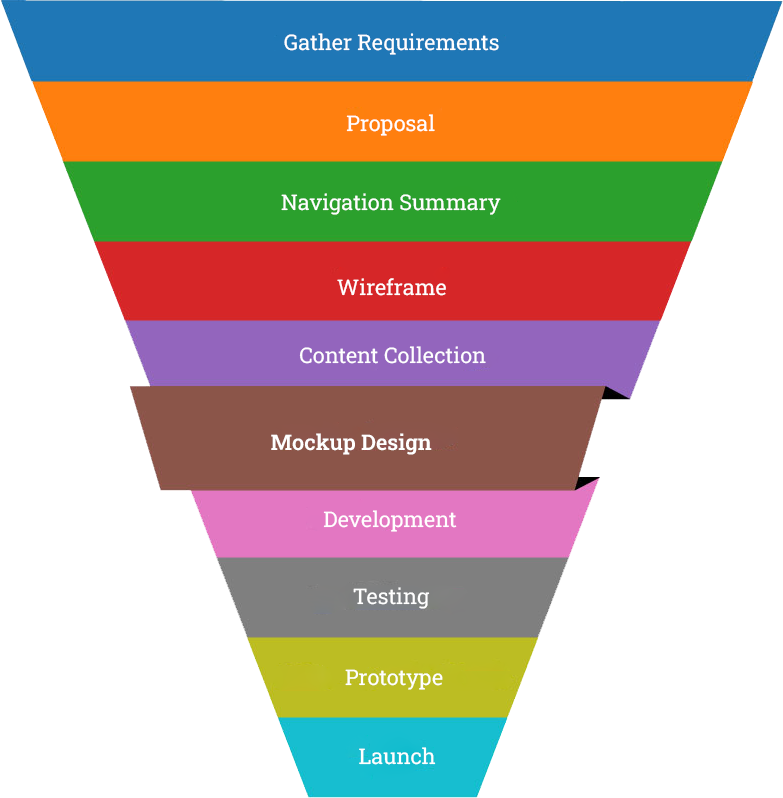
Mockup Design Questionnaire.
By this step you should be extremely familiar with the site layout and its message. Create a less than one page document asking design related questions such as, but not limited to: What are your company colors? Please describe 2-3 websites you admire and specifically detail what style related features you like. Do you have any recent marketing material for us to look at? Basically, the questionnaire needs to be short and to the point. Study the feedback the client gives and you should be on your way towards creating a nice design.
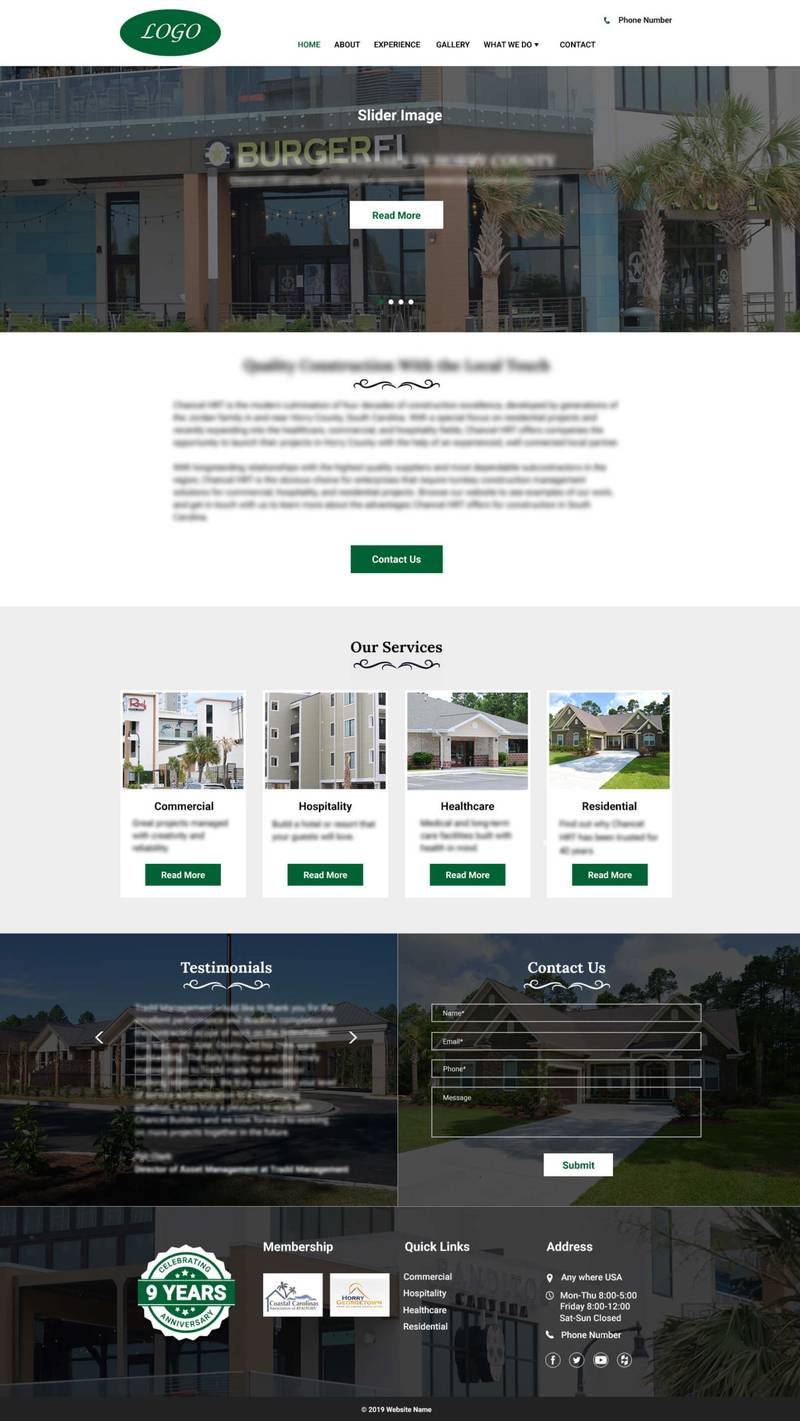
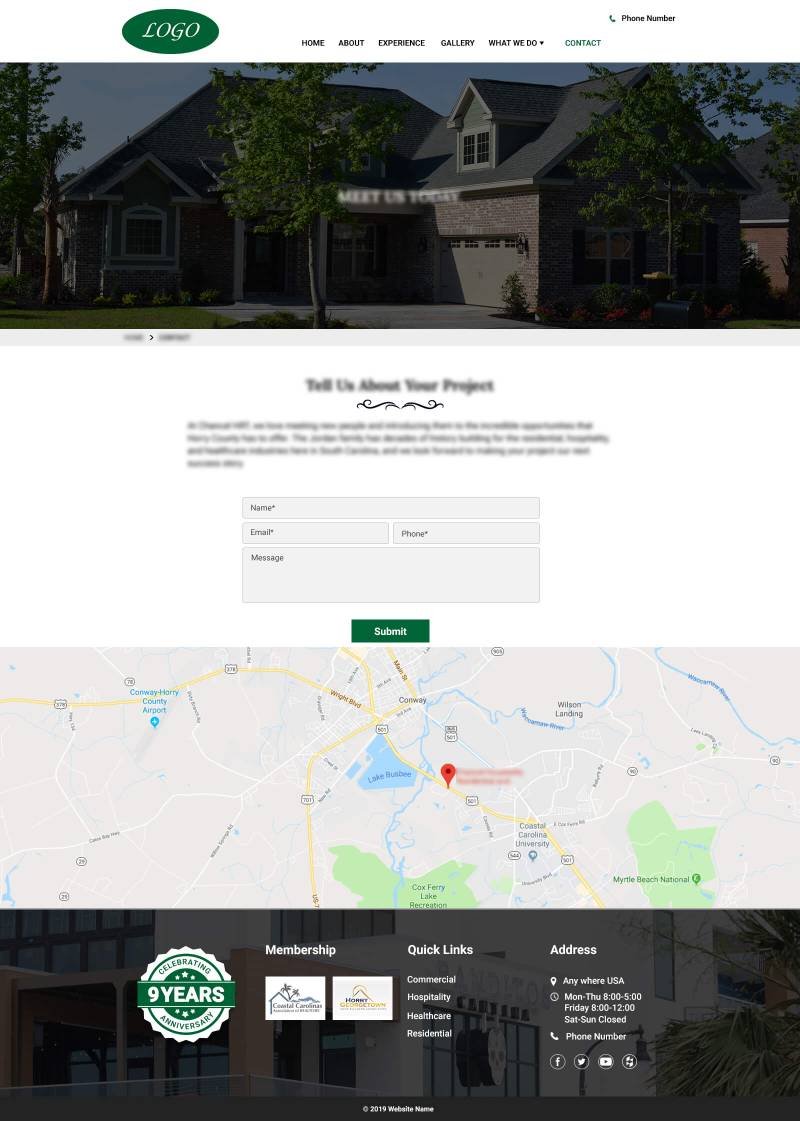
Mockup Concept
With an informational site, you only need to create a Home, Inner (a main service offering) and Contact page. It is extremely important to also use the content you have already collected because it will influence the “likeability” in the customer’s eyes. After all, you have done all this work so far- use your content to your advantage. On the flipside of this, using latin text (lorem ipsum) as filler content will typically get an opposite response.
Page Elements:
The mockup step is the best time to introduce page elements into the design.
During the mockup step is best time to introduce page elements into the design. Think of supporting graphics, call-to-action buttons, PDF icons, thumbnail styles- basically anything that is not copy and images. Establishing the look and feel now helps to “polish” the mockup design. For further clarity, page elements should only be placed in the content areas and not in the head and footer.
When sending mockups, don’t send 2-3 examples- only send one style. Think about it: When you have followed your web design process meticulously, by the time you get to the mockup, all inputs and considerations should flow into one design. Using multiple designs will only muck up the process and waste design hours.
Only produce one set of mockup concepts and not two or three.
As you have travelled through the development process you should be “somewhat in the ballpark” when it comes to producing the design. Creating multiple concepts guarantees you just created a lot more work and complexity for yourself.
The customer will instantly say things like “I like the color on this one… but also like the color on that one…” and you are now in the design swamp, with all its vines, roots, muck and everything that is scary. To add insult to injury, you will not get paid for the extra work you do.
Stick with your original design concepts and make changes as required until the customer says “this is exactly what I want.” Then, politely let them know (by email- a digital trail) “we are going to accept this Mockup Design approval.”
Step 7: Development
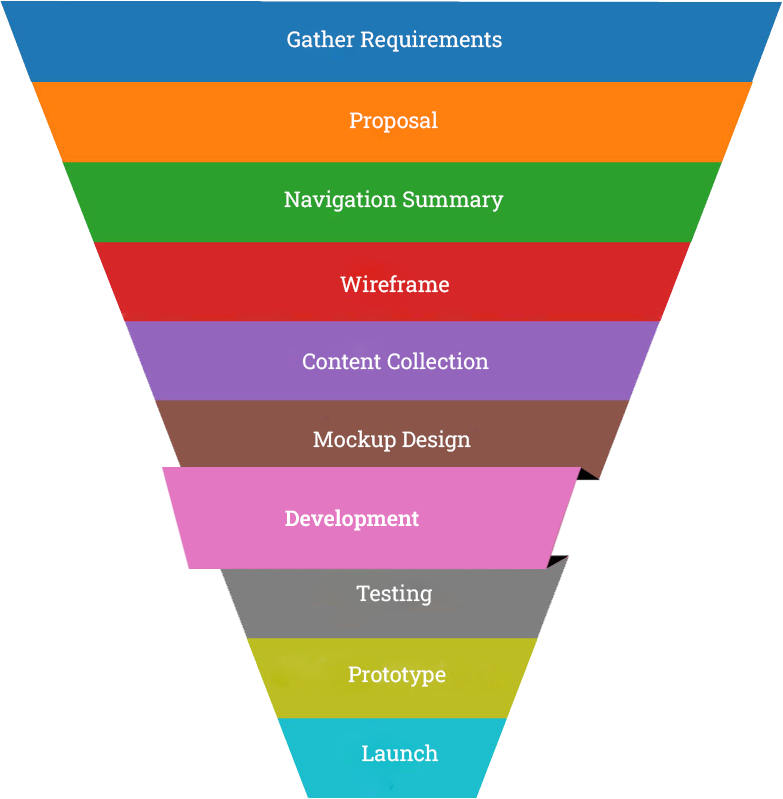
As we move through the web design process, this seemingly difficult step can be one of the easiest. After all, development is more of an assembly job than anything else. And typically the project can begin to rapidly accelerate towards the ultimate goal of the website launch. The fastest way to achieve this is to assign multiple developers to the project. These technicians can work in different areas of the project simultaneously.
Don’t provide a development link as you are building. Unfinished or in-progress jobs simply look bad and send a negative psychological message to the customer. Remember, they are not IT professionals and don’t understand much of what we do. Developers make the mistake of doing this mainly because they want the customer to see they are making progress on the project. Don’t do it. Wait until you are finished. Following your process with good communication skills will give the client confidence in your abilities.
After initial development- it is time to vigorously test. If you have the extra personnel on staff, have an independent tester look over the project who has not worked in the project. They should look over all documents to date to ensure nothing is missing, done incorrectly, functionality is working properly, etc… Why an independent developer?
Since they have little-to-no knowledge of the project, they will not have biases and predetermined notions when they are testing. Having an uncorrupted view of something makes finding errors/bugs much easier. In the event you have a small staff (or it is just you), try to go into this task with the same mentality. You want to try and find mistakes.
Develop your own in house website testing checklist. At minimum, it should feature a line item list of things to check. During testing, The developer simply notates each item they check and also the mistakes they fix.
Our Website Testing Checklist is divided in two parts: Pre-Launch and Post-Launch. We try to keep things as simple as possible!
Development is considered the “fun phase” as your team now has all the documentation, content and client input to build the site. It can be done quickly- especially if multiple developers are simultaneously working on the project much like a construction team would on a house.
The project manager and development team need to be working directly from the direction and notes provided by the wireframes. No party should ever depart or get distracted during this time.
For example: A customer begins sending extra content (or new ideas) during this process.
What do you do? The wireframe has not accounted for this new content/component/page needs to be developed to accommodate for this change. Don’t simply try to add the new feature- create a change order and send it to the client.
Remember this! Scope changes that occur further along the development process can have a larger effect on the timeline and price of the project; than an earlier one. Imagine constructing a three story building.
You are now in the final phases of the project and adding the roof and windows. All of the sudden, the customer wants a bathroom added on the second floor. Since you are so far along in the project, you will need to demolish part of the structure, redo the plumbing, wiring, fire systems, walls, etc… Get the picture now? The more finished a project becomes, the more impact a change request can/will have on it.
Step 8: Testing
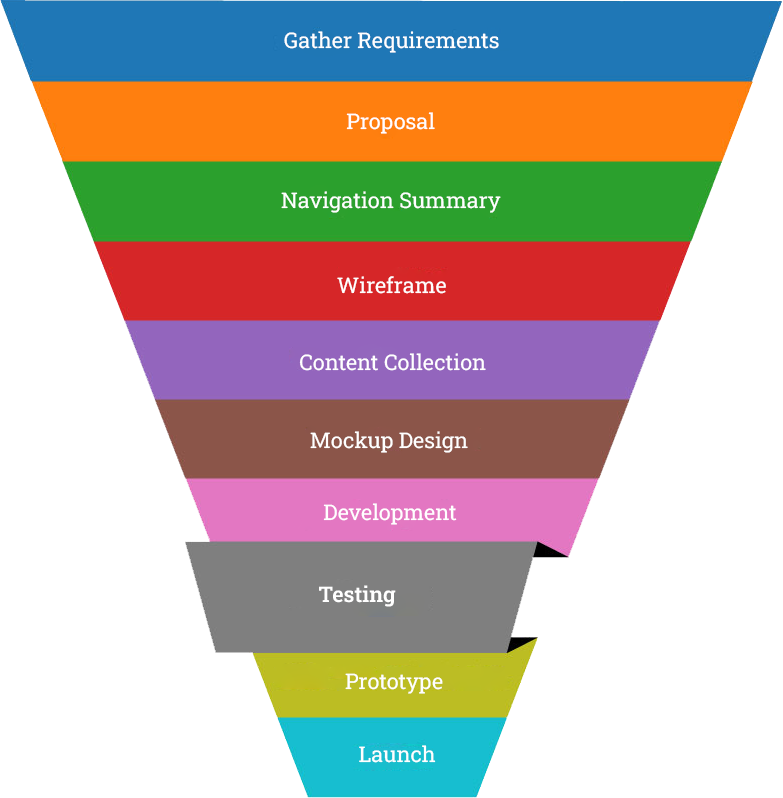
In a perfect setting and if you have a large enough team – there should also be a dedicated tester for this work. Basically, you don’t want the people who built the application to also test it.
Why? A qualified, fresh set of eyes is always more optimal – And this “frame of reference advantage” tends to catch a lot more bugs/errors and they should always use a website testing checklist as a guide.
After the testing is done, the checklist should be sent to the development team for action – and several rounds of back-and-forth is considered normal – especially on large projects.
Think of testing as “QC” or quality control – and every successful manufacturing company has one of these departments.
If you are a smaller company and don’t have the resources to have a testing team, you will need to perform this task yourself – and it is very important to clear your mind before you do it. There are countless times when this event is not truly separated from the development step and mistakes will always be overlooked.
So be smart! Be methodical and meticulous when it comes to testing.
Once the beta version of the website is built, think of this as a newly constructed house: The windows will need to be cleaned, nails picked up, debris cleared, etc. This analogy should be applied when you are doing testing.
Testing tends to be one of the most overlooked steps to a new developer.
Why? They think it is a waste of time and money.
In reality, testing is one of the most important steps and can help elevate your career to the top! Testing, after all, is about quality control (QC).
Testing team must have a complete set of the project notes, and review these documents thoroughly before any testing is started.
These documents provide a backstory to the testing team and allow them to much better do their job. Think of this as doing your due diligence/investigation before setting out on a journey. For example, the project notes will explain, for example, how many pages the website has. What if a page is missing? Well, now you would know!
Having the project notes allows you to understand the scope of what you are about to work on and provides a much better insight than simply receiving a development link to work from.
For more clarity, there is a basic order to this task:
- Review Project Notes thoroughly.
- Test the application with the Website Testing Checklist.
Step 9: Prototype
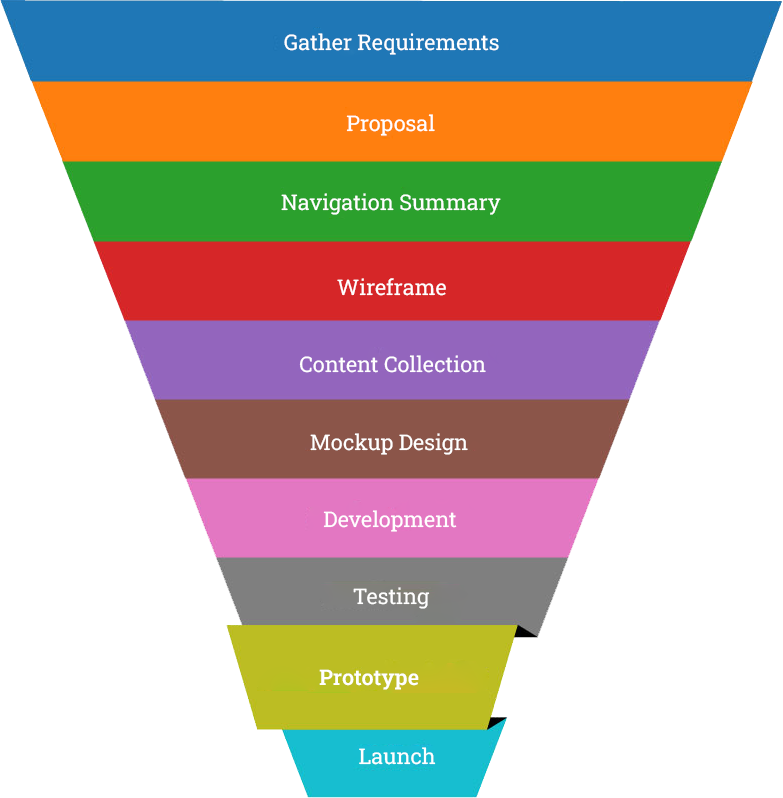
Once the Testing step has been completed, you should send the client a prototype link so they can begin testing and reviewing the website from their side.
In the same email, it is extremely important to have a list of instructions for them to follow such as, but not limited to: “During this time, the client needs to vigorously test their website for any broken links, images not working, text errors, pages not working, etc.”
Important Tip: In a second, supporting paragraph you should clearly state: “During this time, the customer will NOT be adding new pages, images, changing copy, modifying programming, etc… This constitutes NEW WORK and will be quoted as a new project after the website goes live.
Be very careful of this scenario as it happens all the time. For some reason(s), customers like to try and swap copy, images, add pages… just be aware of it! The best way to mitigate the problem is by educating the customer beforehand as to what is in scope- and what is out of scope.
Special Note: As clients are almost always not developers, we don’t send them technical-style website checklists for proofing their website. That would be speaking over their heads!
The prototype is a rough draft (beta) version of the website. And it should be vigorously tested by the client. However, this is also NOT the time to be adding new pages, copy, etc… That is scope creep and requires a change order.
When a website prototype is being tested on a development server, the email forms will never work.
Why? The contact form is “tied” to the domain name. Rather than getting into the technical aspects of this – The site needs to go live in order for the email forms to function.
You want to tell the client this upfront, or they will not only report this problem to you… They can begin to immediately think their project was done poorly and now you have a larger problem on your hands.
Step 10: Launch
After the customer approves the prototype, you should begin the launch sequence. Some call it “go live,” etc., these terms are essentially the same thing. Because this step is technical in nature, below are some main things to do.
- Migrate website files from development server to live server
- Install SSL certificate
- Integrate customer email ID in the contact form(s)
- Thank You page redirection
- Upload robots.txt and sitemap.xml file
- Recheck Prototype step
Special Domain Name & Hosting Note
The above process is based on the assumption the client has an existing website on their server- and this is a website redesign project.
90 Day Warranty
Have some version of a warranty you send to the client after going live. You should also review it with them so they understand you are not liable for the next 10 years or 100,000 miles- or whatever comes first.
Maintenance Agreement
Another important policy to have is a customer maintenance agreement. Moving forward, this defines how the developer will work for the customer and under what terms. You will be amazed at how many customers think that once their site is built, the developer is responsible for the next several years of unlimited updates. Because of this unrealistic assumption (and similar ones) a clearly defined maintenance policy helps you stay profitable in the long run.
During this time, the domain name and website hosting details are handled in the Development step. We work in this order mainly for time saving purposes.
Have the customer vigorously test their website for any bugs or errors. Once this is completed, have them reply with an “I accept this project as completed” type email. This confirmation helps to officially end the project!
Don’t fall into the “Unlimited updates for $X/month” mindset. While a few hundred dollars per month may initially seem enticing, you could be getting yourself (and shop) into a slippery slope in which you cannot recover financially.
This is how it happens: At first, the customer is not asking for many changes as their site is basically brand new. As time goes on, they begin to ask for more development and this soon begins to grossly exceed the profitability margin of your maintenance agreement.
You are now operating in the red and it is dangerous when you cannot control costs. If this is occurring across multiple accounts, you could be in trouble. So please, take my advice and don’t do it. Instead, have an agreement that says “ bills in increments of .5 hours @ $X per hour.
This includes, but is not limited to: Email support, content changes, plugin updates, SSL integration (they buy and you install), research (be careful with this one) and basically anything that you define as work since you are a billable time company.
When you get the work request, simply send back a quote featuring the work, timeline and fee. Also, be sure to mention any dependencies or contingency scenarios that could happen. When in doubt or need to explain something, note it in your quote.
Over time, your customers will appreciate not being on the hook every month for a lump sum of money. And, this is another step ensuring your profitability. In addition, your professionalism will probably result in more referral business.
In addition, your professionalism will probably result in more referral business.
Summary
If you are a developer or casual reader, we hope you gained something of value from this article. There are many, many ways to build a website, but we have shared the way we do it at PalmettoSoft.
For time’s sake (and not to bore you), we didn’t discuss sub-steps and other low level processes. Some of the opinions mentioned are strong, but that is intentional.
Why? You will get more value out of something that has been learned as a painful lesson rather than a sugar-coated theory. It is much easier to learn from another than to go through it yourself!
You may also be looking at this article thinking, “I don’t have any of this stuff. How in the world am I going to develop all these documents?”
Well, you are in luck because you are not facing a climb up Mount Everest. Actually, the tasks are probably much easier than you think.
Our Philosophy: Speed is better than perfection!
You cannot score a goal if you are not on the playing field.
Simply create a list of documents you need and knock out each one, one at a time. They don’t have to be long-winded or written with the perfect “legalese” language. Just create it as your master copy and always add to it as you learn more through experience.
The same is true with any processes/methodologies that your company follows. Let deadlines and due dates drive your business development, rather than always striving for perfection.
So create it, start using it and periodically revisit it as you evolve.
All Comments
Thanks for sharing such a great post. For one of our website design projects, we are in the launch step and the client suddenly asked us to add a few services pages as they are planning to expand their services. What should we do in this situation?
I saw you spoke about the Change Order in the Navigation Summary step caution box. It makes sense- but we are almost done with the project and this may not work for me. Do you have any other sage advice to help? Please let me know! Thanks.
Hi, this is Oli and I really like the process explained by Rhett. I have never seen this type of explanatory post before. The Caution Boxes are my favorite element. One of my customers wants to build a website in Wix, but I recommend developing in WordPress as it is a more widely used CMS. Please… if possible… give me some WordPress “selling tips” that will help. Thanks!!
We are a WordPress shop and most of the time, we recommend our clients to use the WordPress CMS (content management system). For most website’s that don’t require advanced functionality, we recommend this platform.
WordPress is currently used by 42.2% of all Internet websites, and 65.1% of all content management systems.
Selling points: It is open source technology (non-licensed and free), scalable, features easy migration and millions of developers can work on it. It is also updated constantly with plugins and is easy to use.
If my customer is asking for the lowest price for their website design project, then what should be my approach?
Thanks for your question. I will now share an opinion:
After all your overhead costs are covered, you should have a minimum markup of 40% on the project- do not go below that. Why? You will win many “battles” and lose others. I am referring to battles as being the time, effort and cost it takes to build a website. The “40%” rule is a paradigm that has sort of developed over the years for our agency.
Keep in mind to also include all software fees such as subscriptions to Quickbooks.com, credit card processing fees, banking fees, and any/every fee required to run your business.
Do you prefer drop down menus over mega menus or vice versa?
Typically, drop down menus are used when a website has fewer pages. Whereas larger websites, with many pages, can use mega menus for a better user navigation experience as all the pages are shown at once.
I appreciate the way you have explained the 10 steps web design process in this blog.
Thanks for reading our blog.
Do you know nowadays Google prioritizes Accelerated Mobile Pages to rank higher on the mobile search?
Are you considering this during your website development steps?
Yes, we focus on building responsive websites by using the AMP framework for faster delivering of content to mobile users.
In our post, we intentionally do not get too technically detailed in order not to confuse readers. However, your comment is appreciated and we thank you for it.
I really like this step-by-step process blog post. Awesome write up!
Can you guide me on what are the major points we should add in the “maintenance agreement” with the client?
This includes, but is not limited to: Email support, content changes, plugin updates, SSL integration (they buy and you install), research (be careful with this one) and basically anything that you define as work since you are a billable time company.
When adding these to your maintenance agreement, make them line items as they will stand out more and be easier for your client to understand. Also, over time, you can edit this document and continually make it better as you experience different client maintenance scenarios!
In the Content Collection step you have mentioned that…
“Do not proceed until the next step until 100% of the content has been received and inventoried.”
If a customer fails to provide 100% content within the project time, what should I do in that case? Because I have a fixed timeline for that project and have to maintain that from a profitability standpoint. Please advise.
Within your proposal, you can implement a Project Overrun Fee, which mitigates this problem most of the time.
Since you are already midway through this project, I would call the customer and speak to them- and in a very nice manner explain to them the benefits of speeding up this process, from their side (not yours). For example, “you want to get this site launched earlier than later as it can help your business grow, etc…”
Thanks for sharing such a great blog post. I love your step by step website design process. I own a startup business and planning to build my own website, can you guide me how to select a professional web design agency? Your advice will be highly appreciated.
We recommend initially doing a search on Google for a query such as “your location/city + web design.” Then, review the first page organic results. You want to look at their portfolios, testimonials and check their customer reviews online.
After you select a few you like, contact each one via email and see who responds back in a timely manner. Then, speak with each on the phone. Once you feel comfortable with everything, select the vendor.
I really like your 10 Steps process blog post and am a beginner in this field. Can you guide me what is the best CMS platform for building an eCommerce website?
Hey Jonathan, we recommend WooCommerce, as it is open source, has drag and drop and features- and seems to be a great all around E-commerce platform. It’s also one of the largest platforms in the world.
I saw you mentioned SSL in the website launch step. Can I launch a website without an SSL certificate? Is it possible to add it later?
Hello Mary Lou, you can launch a website without an SSL, but, it is better to do it during the launch. This is especially true with E-commerce websites where the buying process needs to be encrypted.
Also, the search engines and the viewers will see an “HTTPS” in the address bar and this helps with better search rankings and increased website trust.
These days, SSLs can be included in your hosting plan and don’t have to be separate (and expensive) purchases.
Website design is a very dependent job. The designer and the client both need to be involved.
Question: If your customer is ALWAYS late in delivering materials, how can you stop this?
During the proposal review stage, I recommend to point this out very clearly and let the client know how often this happens- and why both parties want to avoid it like the plague.
It kills your profitability and basically guarantees a delayed website for them. This is a lose-lose situation.
Then, I would follow up that same conversation with an “Email of Reference” to the customer.
By making everything clear and official, your chances of having this problem occur should be greatly reduced. Thanks!
Hey! I came across your blog through Google. Most amazing thing is, PalmettoSoft is ranking on the 1st page of Google for the global keyword “web design process.” I now have a much better understanding of how the website building process should work. And I will bookmark your blog post for my future reference 🙂
Thanks, JJ for pointing that out. Over the years, we evolved into a digital marketing agency and also rank highly for the keyword SEO Process. As you know, web design and SEO are extremely interrelated- and we rely heavily on our web design experience when managing SEO accounts.
I can see you have mentioned balsamiq.com as only one wireframe tool but can you please suggest two more you recommend? I want to look at a few before making a decision. Thanks!!
Hello Scott, we recommend the below two tools:
https://moqups.com/
https://www.mockflow.com/
I have a question. Do you really think a project timeline should be shared at the initial stage of the project? As a web designer, I always give an approximate timeline after the finalization of the mockups.
We actually give the project timeline in Step #6, after 100% of the website content has been collected. Over the years, we have found content collection to be the most labor intensive (back and forth) step of the website design process, followed closely by the mockup design step. Plus, already having the content greatly influences the look of the mockup and greatly improves its chance of being accepted/liked by the customer.
Giving a timeline after the mockups is understandable- especially if you are not using wireframes, which we highly recommend. Thanks.
Excellent article! All things have been explained clearly and the schedule makes sense. I will definitely follow this process.
We appreciate it!
A 90 day warranty for a website is a lot of time. If any major issue arises, such as the deletion of files, how would you handle this? As you probably know, files get deleted in a number of ways. Thanks.
During the 90 day warranty, we keep an updated backup file of the live site to our local server. Of course, this means the site is also hosted on an external server. In the event of a crisis, we can typically restore the website quickly.
I am a developer and always use mockups as my wireframe, don’t you think you may be utilizing too many steps in the building of a website?
We equate building a website to that of construction. Would a builder first paint a picture (rendering) of a structure and then attempt to build it? Never.
The larger the project, the more important wireframes (blueprints) become. Within wireframes, imagine the plumbing and electrical systems (i.e. now think of backend programming) explained in the blueprint.
Wireframes, most importantly, set expectations for the both the client and developer/designer. This also goes along with the industry saying: “For every one hour you properly plan- you save six hours of development time.”
I have heard every website needs an SSL certificate now and not just eCommerce sites? Looking forward to your reply!
We recommend that every website have an SSL as Google’s algorithm like seeing the layer of security it provides. It basically adds browsing security and is also considered a “trust factor,”
Special note: Some web hosting providers supply an SSL free of charge with their plan, while others charge for it.
Is WordPress still the best CMS?
“Best” is really which content management system (CMS) matches both your requirements and budget. However, WordPress is the most popular CMS in the world and see below.
“WordPress is the world’s most popular content management system powering 34% of all websites on the internet. On top of that: WordPress has a 60.8% market share in the CMS market. WooCommerce powers 22% of the top 1 million ecommerce sites in the world.”
Reference: https://kinsta.com/blog/wordpress-statistics/
By the way, we use WordPress as a default go to CMS!
Do you have a good resource that you prefer for stock images? Or better yet, do you even use stock imagery? Thanks.
Yes, we use Istockphoto.com and Shutterstock.com sometimes. There are many resources out there, but these have worked well enough for us.
Can you do SEO setup work and build a site at the same time?
Yes, however you need to run both schedules simultaneously and SEO begins during the website Development step.
This is a great article! Most new web designers make the mistake of going straight to the mockup design stage without the wireframes. Getting the wireframes done first sets the client’s expectations and actually speeds up the design process. I totally agree with you.
Yes… imagine trying to build a house with no architecture plans! I think our industry is so relatively new and unregulated that we literally a lot of bad practices that go unnoticed and also damage our reputation as web developers.
I have had two customers offer me to do work for free for a piece of their company. Both times it didn’t work out. You are so right on this.
Unfortunately, this probably won’t be the last time you hear this. You never want to get involved in someone else’s company for a variety of reasons.
I especially like the funnel image you guys made, it helps me to better understand how your process works. I will be revisiting your blog more, thanks.
Very much appreciated! Custom designed infographics paired with copy, not only help the reader understand better- but they can also rank very highly the the Google image search results (for that keyword).
Great and informative! I learned some amazing tricks from this post. I will use it as a reference for my future projects. Beautiful concepts and clear explanations on what can be a dark and twisty road for so many new to this industry.
Thanks! There is no substitute for experience and we try and help as many as we can!
A few years ago, I had a client on a maintenance plan for $200/month unlimited work- big mistake! One month I ended up doing about 15 hours of work handling email setup, domain name switching and support, etc. It got to the point that I was about A to pull my hair out! I think you can do a set amount per month, but you have to create a maintenance proposal in order to be successful.
I understand Kathleen and trial by fire can sometimes be the best teacher. Once you create your baseline agreement, you can always modify it as you learn more. Over time, you should have a robust maintenance service in place and happy customers to go along with it.
In my experience as a designer, about 90% of the content delivered late! LOL.
By the way, great blog!!!
I agree. Just about every project we work on will experience this. Why? It’s not the client’s area of expertise and many of them simply don’t allocate the time or attention required to get it done. Thanks.
I love this article and know in order to design, develop and launch a website– having a process is extremely important.
I especially like the content inventory step in which you collect ALL the content from the client. As a freelance designer, I am always struggling with collecting images and copy from my clients. Moving forward, I will definitely use this type of spreadsheet to make my job easier!
Thanks Sophie, this will make your work much easier and more profitable moving forward!
This is a very informative blog post and I have gotten a lot of great information by reading the comments. Here’s my question about Change Orders: I see where they begin and understand the concept.
I am a new designer and currently have a client who calls me almost everyday wanting to change things on her site. I want to stop this, but also don’t want to make her mad. She has basically taken over the designing of her site. Any suggestions are much appreciated.
I recommend to call her and kindly talk about the matter. Most people understand that nobody wants to work for free, nor should they. During the conversation, tell her you want to “freeze the current scope” of the project. Any change requests moving forward will be first analyzed and sent back to her via email with a: Price, timeline extension and any other important info that needs to be addressed (ex: expectation change to some degree).
Moving forward, I would create your own Change Order, and use this numbering system: Change Order Version 1.0, Change Order 2.0, etc…
This morning I read your blog- wow. Very impressive. I consider myself somewhat philosophical in many ways. You mentioned “Our Philosophy: Speed is better than perfection!”
Question: Have you ever considered something like “Speed should balance with Perfection?” In my humble opinion, you should have both. Thanks for listening to my rumbling 🙂
Thanks for the philosophical comment David! I agree that “speed should balance with perfection.” Our intention with that phrase is mainly that it’s better to get something done and launched, than to keep it in production too long in the effort to achieve some level of perfection.
For example, YouTube videos for your website: If you know you need/want to do them- go ahead and begin doing them. All things being equal, more of your competitors will have NOT have YouTube videos on their site, so you will automatically have a marketing advantage over them.
Basically, its better to start doing something than sitting around too long and pondering about it… and also trying to make everything perfect. Speed to marketing is very important! Thanks for your comment.
Why do you provide a project timeline at step #6 and not upfront?
Within our process, Step #6 is the more of a “formality” rather than an actual step. What do I mean? Because +70% of the time, the Content Collection step is late, because of the client. Obviously, their job is not to gather images, write copy, etc…So they are almost always late- and this messes up the original schedule.
As a result, we create the actual Project Timeline once we receive the content. Because at that moment, the rest of the project is no longer “client dependent” from a development perspective.
Thanks for the question!
I am a developer and use maintenance agreements with my clients, but instead of using .5 increments and tracking time, I charge them, for example, $300/month. A problem is the client is always sending me stuff (like 15-20 hours a month!) to do and I am sorta worried to confront them about it. Any suggestions?
Thanks for your question. There is nothing wrong with communicating an issue with your client as long as you are clear and respectful. I would bring this to their attention and discuss this matter on the telephone and/or voice app because this should NOT be initially sent by email. Once you finalize an agreement with them, then send an official email agreement of the new terms. Most customers understand you don’t want to do work and not get paid for it. Thanks!
During the Mockup step, this is the time when you send the questionnaire! OMG!
I always have sent it at the beginning of the project and this has probably caused a big loss of efficiency for me during the overall build out of the website. This is an awesome blog post by the way!
Thanks for the kind words, Joseph. Most of these client website questionnaires that float around Internet have the intention of getting all required info upfront in order to build a website. As you can imagine, there is no way possible this will ever work.
Example: If you were a construction company and the city contracted your company to build a four lane bridge over a river- you would not send a team out and start building the bridge! Some of the first thing(s) is you would do a site survey, conduct soil samples, and eventually draw a set of architecture plans (wireframes in our industry).
If you skipped the above, the bridge would quickly collapse!
At PalmettoSoft, we send the Mockup Questionnaire at the beginning of the Mockup step. Why? Because that is the most appropriate time to send it. We have already done the wireframes and collected all the content.
Thanks for your comment and please visit our site from time to time.
My main question is this… Why do you guys use 10 steps and others use 5 steps? Or 6 steps?
Hey Maria, this a great question!
Our Process is meant to be understood in a “high level or overview” type manner. So… there are many sub steps not mentioned. This is because each client is a bit different so sub steps can be deleted, modified, etc…
Basically the Process is a roadmap which provides a direction for overall success.
This is why you will see Five Steps, Six Steps, etc… Personally, we like to use 10 as we feel it provides a better understanding of the major steps involved in building a website.
Thanks and I hope this helps.
Thanks for this explanation, this is really interesting. If you don’t mind, please explain more about sub steps so I can better understand.
An example:
Wireframe: During this step, once our team has completed the initial “Version 1.0” of the wireframe, we send it to the client for review. We don’t mention this in this post as some client’s approve the 1.0 version, while others may require 3-4 revisions and end up with a Version 4.0.
Because this is considered a sub step and almost always is a little different per project, we don’t mention it (or the many other sub steps in building a site) in this post.
In reality, each main step could easily have 3-10 sub steps- it is fluid and dynamic according to how you develop sites.
The main takeaway: Our 10 Step Process gives you a general “roadmap” to work towards. If you follow it, you want end up running off the road and hitting a tree 🙂 Hope this long winded explanation helps!
Thanks!!!
The website launch is one of the most important steps of a web design project. You did a splendid job here. I think many web designers need to learn more about this step as a lot of problems happen during this time.
Thanks and there is basically a lot of technical odds and ends that need to done at this time in an organized manner. You can also develop a basic launch checklist for this step and that will help ensure nothing is missed.
Thanks Edward. When you plan correctly, all of your and the customer’s input should go into the initial mockup design. As a result, there is no need to do multiple versions. Multiple version basically creates a lot of unnecessary and uncompensated work for the developer.
Simplicity is always better than complexity!